Table of Contents
Composing a System for the Raspberry Pi
This tutorial describes how to compose and deploy a system with one component on RaspberryPi and other component on your PC.
Basic Information
| Level | Experienced |
|---|---|
| Role | System Builder |
| Assumptions | Completed Developing Software Components for the Raspberry Pi using GPIO Pins and Develop Your First System by Composing Software Components tutorials |
| System Requirements | Successfully installed the SmartSoft environment on Raspberry Pi and the SmartMDSD Toolchain on a PC 3 LEDs with transistors, wires, and a breadboard |
| You will learn | How to establish communication between Components located on Raspberry Pi How to deploy a System from your PC on a Raspberry Pi |
Introduction
This tutorial describes how to compose a system and run components on the Raspberry Pi and your PC. The first part of the tutorial shows how to setup component communication when both components are located on Raspberry Pi. The second part of the tutorial describes how to create a system on your PC using the SmartMDSD Toolchain and establish communication with a Component located on a Raspberry Pi.
By the end of this Tutorial, you will have build deployed:
- A System, that has both components on Raspberry Pi
- A System, that has one component on a PC and the other component on a Raspberry Pi
Since the Raspberry Pi, does not have the SmartSoft Toolchain, you will have to build and deploy the System manually, this will be described in the First part of the tutorial. The second part of tutorial will walk you through system building and describe how to connect a component built on the Raspberry Pi, through the NamingService to the system located on your PC.
The tutorial is structured as follows:
- Section 1: Manual setup of the System on a Raspberry Pi
- Modifying *.ini file
- Establishing communication between components(Deploying the System)
- Section 2: Compose System on a PC and deploy it on a Raspberry Pi
- Composing a System on a PC
- Modifying NamingService IP/port
- Deploying the System
Section 1. Manual setup and deployment of the System on a Raspberry Pi
Since Raspberry Pi does not have the User Interface of SmartSoft toolchain, in this part of tutorial you will see, how to manually setup and deploy a simple 2-component System, by making slight modifications in autogenerated *.ini files and deploying the system from terminal.
Section 1.1. Modifying *.ini files
1. Download ComponentTrafficLight and ComponentTrafficLightTest on a Raspberry Pi and copy them to your component repository.
2. Build both of your components by going into ComponentTrafficLight/smartsoft and ComponentTrafficLightTest/smartsoft and executing the following commands in terminal:
if you do NOT have a build directory in ComponentYourComponentName/smartsoft:
 mkdir build; cd build
 cmake ..
 make
if you HAVE a build directory in ComponentYourComponentName/smartsoft:
 cd build
 rm -rf * #this will delete all files inside the directory, so make sure you are in the right one
 cmake ..
 make
3. Add these paths to yor libraries where “/home/smartsoft/myRepos/” represents path to the folder that contains your Components, Systems and Domain Models
 export SMART_PACKAGE_PATH=$SMART_PACKAGE_PATH:/home/smartsoft/myRepos/
 echo 'export SMART_PACKAGE_PATH=$SMART_PACKAGE_PATH:/home/smartsoft/myRepos/' >> ~/.profile
4. Go to <component folder>/smartsoft/src-gen and open ComponentTrafficLightTest.ini.template. Change the Client port Parameters(aproximately lines 50-70) as shown below:
5. Rename ComponentTrafficLightTest.ini.template file to ComponentTrafficLightTest.ini
6. Go to ComponentTrafficLight/smartsoft/src-gen and rename ComponentTrafficLight.ini.template to ComponentTrafficLight.ini without any modifications in the file.
7. Copy ComponentTrafficLight.ini and ComponentTrafficLightTest.ini to ~SOFTWARE/smartsoft/etc
Now you are ready to start the NamingService and to test your system.
Section 1.2. Deploying the System on Raspberry Pi
1. Open Terminal and start the NamingService and ComponentTrafficLight, that provides the service with:
cd $SMART_ROOT_ACE
./startSmartSoftNamingService

bin/ComponentTrafficLight
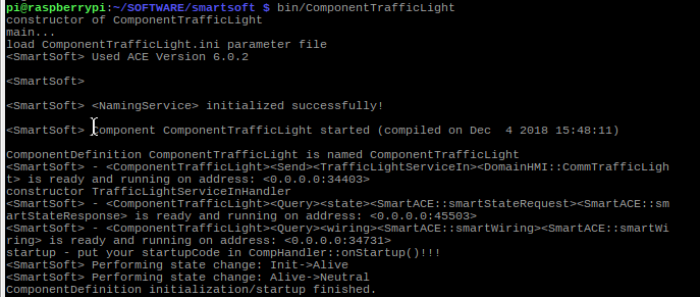
You should see in your terminal window this:
As you can see the component, that provides the service has been initialized but it still does not provide output. Open another terminal tab, go to ~SOFTWARE/smartsoft and start component that requests the service with:
cd $SMART_ROOT_ACE
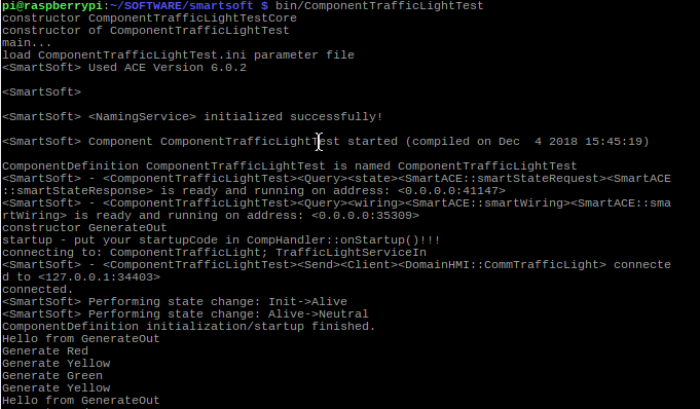
bin/ComponentTrafficLightTest
You should see this:
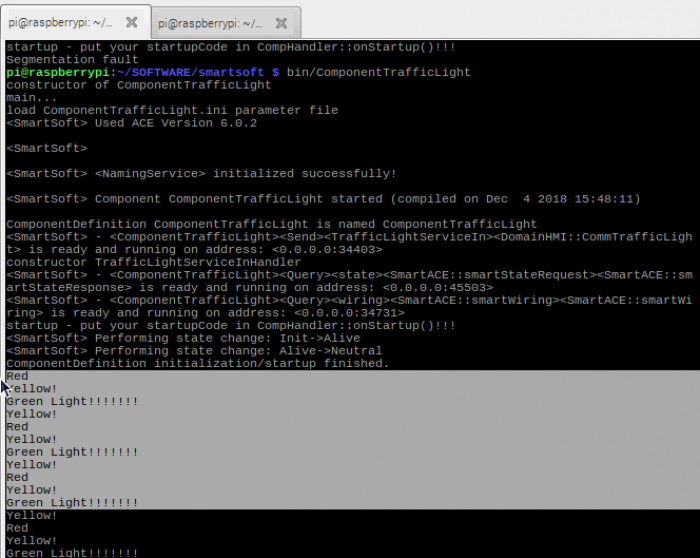
And if you return to the terminal window with ComponentTrafficLight, that provides the service you will see that it started receiving signals from ComponentTrafficLightTest that requests the service:
If you did all correctly, you should also see your LEDs blinking, and you are ready to try to deploy this system from your PC.
Section 2. Composing System on a PC and deploying it on Raspberry Pi
For this part of the tutorial you need a ComponentTrafficLight (provides the service) on a Raspberry Pi and your ComponentTrafficLightTest (requests the service) on your PC. If you hadn`t made them already, the process of developing these components is described in section_2_creating_components_for_a_system.
The goal is to develop and deploy a system that controls LEDs on a Raspberry Pi, from a PC. This section has detailed description of System Building and Deployment processes for this purpose.
Section 2.1 Compose System on PC
At this point we start building a System on your PC, since Raspberry Pi does not have the SmartSoftToolchain. If you encounter difficulties in this part of the tutorial you may review Develop Your First System by Composing Software Components.
Create new System and set up the System Architecture
1. Create a new System with SmartSoft Toolchain on your PC with New ⇒ System Project (Tier 3) and call it SystemTrafficLight.
2. Open SystemTrafficLight ⇒ representations.aird ⇒ SystemArchitectureViewpoint ⇒ SystemArchitectureDiagram ⇒ SystemTrafficLightComponentArchitecture
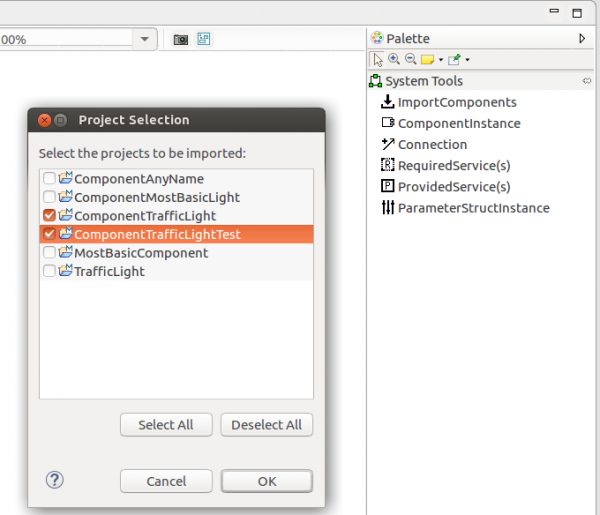
3. Drag and Drop ImportComponents from Palette ⇒ System Tools ⇒ ImportComponents
Select your ComponentTrafficLight and ComponentTrafficLightTest and press “OK”.
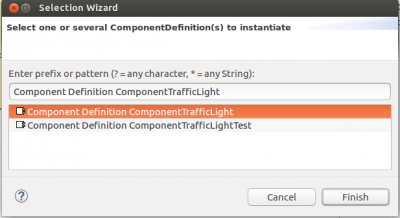
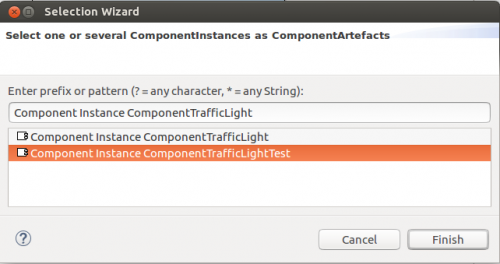
4. Import Component Instances by drag and dropping ComponentInstance from Palette ⇒ System Tools ⇒ ComponentInstance
Select ComponentTrafficLight and press Finish.
Do the same with ComponentTrafficLightTest.
5. Add Services and Connect them:
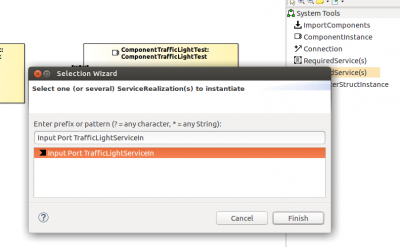
Drag and Drop ProvidedService(s) on ComponentTrafficLight from Palette ⇒ System Tools ⇒ ProvidedService(s)
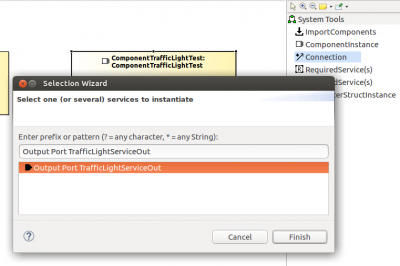
Drag and Drop RequiredService(s) on ComponentTrafficLightTest from Palette ⇒ System Tools ⇒ RequiredService(s)
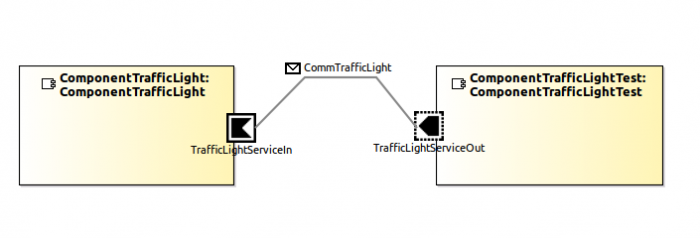
Now connect the Provided Service TrafficLightServiceIn with Requiered Service TrafficLightServiceOut with the Connection Tool from Palette ⇒ System Tools ⇒ Connection
Now your System Architecture should look like this:
Setup the Target Platform Viewpoint
1. Open SystemTrafficLight ⇒ representations.aird ⇒ TargetPlatformViewpoint ⇒ TargetPlatformDiagram ⇒ SystemTrafficLightTargetPlatform
2. Drag and Drop TargetPlatform from Palette ⇒ Platform Tools ⇒ TargetPlatform
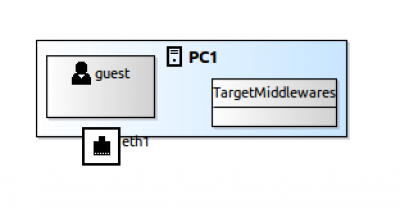
3. Drag and Drop on your Target Platform the NetworkInterface option from Palette ⇒ Platform Tools ⇒ NetworkInterface
4. Drag and Drop on your Target Platform the LoginAccount option from Palette ⇒ Platform Tools ⇒ LoginAccont
Now your Target Platform Viewpoint should look like this:
And last but not least, we need to setup the deployment.
Setup the DeploymentViewpoint
1. Open SystemTrafficLight ⇒ representations.aird ⇒ DeploymentViewpoint ⇒ DeploymentDiagram ⇒ SystemTrafficLightDeployment
2. Drag and Drop TargetPlatform from Palette ⇒ Deployment Tools ⇒ TargetPlatform
3. Drag and Drop on your Target Platform the UploadDirectory option from Palette ⇒ Deployment Tools ⇒ UploadDirectory
4. Drag and Drop on your Target Platform the NetworkInterface option from Palette ⇒ Deployment Tools ⇒ NetworkInterface
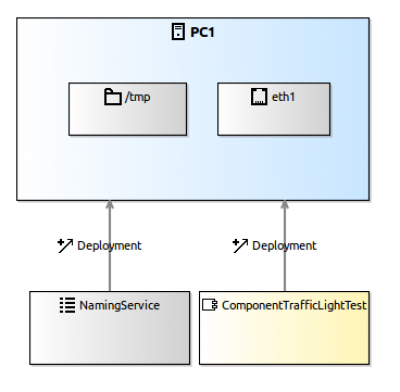
5. Drag and Drop NamingService from Palette ⇒ Deployment Tools ⇒ NamingService
6. Drag and Drop ComponentArtefact from Palette ⇒ Deployment Tools ⇒ ComponentArtefact
Select Component Instance ComponentTrafficLightTest and press Finish.
7. Connect NamingService and ComponentTrafficLightTest with your Target Platform using Deployment tool from Palette ⇒ Deployment Tools ⇒ Deployment
Now your Systems Deployment View should look like this:
You are almost done! All that`s left is to configure the ip/port in your component on a Rapsberry and you are done!
Section 2.2. Configure IP/Port for the Naming Service
1. Get IP address of your PC.
You can do this with an ifconfig command. In this tutorial we will use X.X.X.X as an IP address.
2. Get the port that your NamingService is using
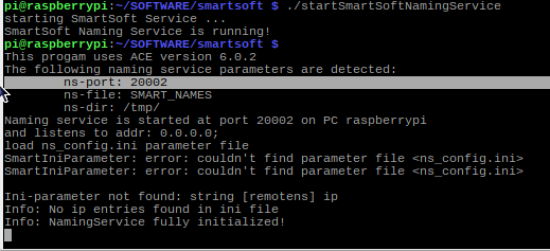
On Raspberry go to ~/SOFTWARE/smartsoft and start naming service with the following command:
./startSmartSoftNamingService
Once you do it you will be able to see the port number:
> ./stopSmartSoftNamingService #stops the Naming Service
So now you have X.X.X.X:20002
3. On Raspberry Pi execute the following commands in terminal:
export SMART_NS_ADDR=X.X.X.X:20002	#set the path
echo $SMART_NS_ADDR			#check the path
These commands must be executed in the same terminal tab, as the command to start your component every time you want to run your component in a new tab, or every time you start a new session on your Raspberry Pi. Or, if your NamingService will be mostly located on the same IP/port, you may save them to ~/.profile file by executing the following line:
echo 'export SMART_NS_ADDR=X.X.X.X:20002' >> ~/.profile
Do NOT forget to put instead of X.X.X.X your PC`s IP address. And also to change the port if your NamingService on a Raspberry Pi had a different port number. Save the file and reload the Raspberry Pi. If you don`t want to reload, simply type:
source ~/.profile
Build both your components by going into <components directory>/smartsoft/build in terminal and build it with the following commands:
 cmake ..
 make
You are now ready to deploy the system.
Section 2.3. Deployment
On your PC. Right click on SystemTrafficLight ⇒ SmartSoft Build Tools ⇒ Deploy
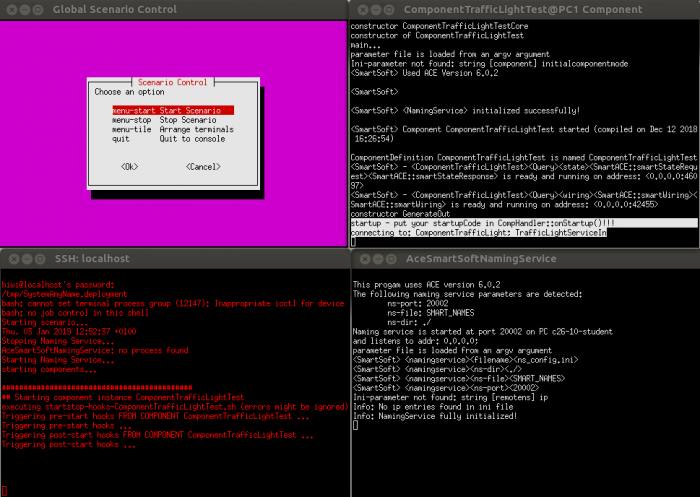
Select menu-start Start Scenario and you will see:
As you can see, your ComponentTrafficLightTest is waiting for connection to the service.
On Raspberry Pi. Go to ~/SOFTWARE/smartsoft and execute the following command:
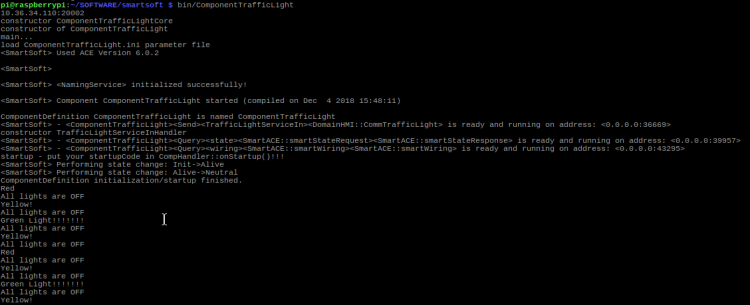
bin/ComponentTrafficLight
You should now see this output and the blinking LEDs on your Raspberries.
If you got the same result, congratulations. You have completed the SmartSoft Raspberry Pi tutorial.

